March 30th // 2009

Giant Dwarf // Anthropologie

The first year that I attempted to design accessories, I would sometimes hear from lovely ladies that my work was very Anthropologie. Not knowing what this Anthropologie was, I decided to take it as a nice compliment and continue creating as usual. While living in Portland, I discovered a catalog with the most exquisite treasures and absolutely gorgeous photographs of coveted creations. At that point everything made perfect sense and it was my goal to somehow connect with this ethereal company.

Giant Dwarf // Anthropologie Giant Dwarf // Anthropologie

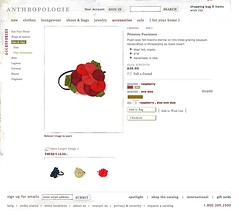
I am overwhelmed with glee to mention that the Rosette Fascinator is now a part of the Anthropologie catalog. It is called the Primrose Fascinator and it is available in Raspberry, which is actually The Valentine, and Gold, which is just a hair different than The Harvest.

Giant Dwarf // Super Secret Project

Anthropologie contacted me in late February asking if I wanted to partner with them and discuss future possibilities of using one of my designs. They asked for samples of the Rosette Fascinator, which I happily sent, and after a brief waiting period, I received a promising proposition.

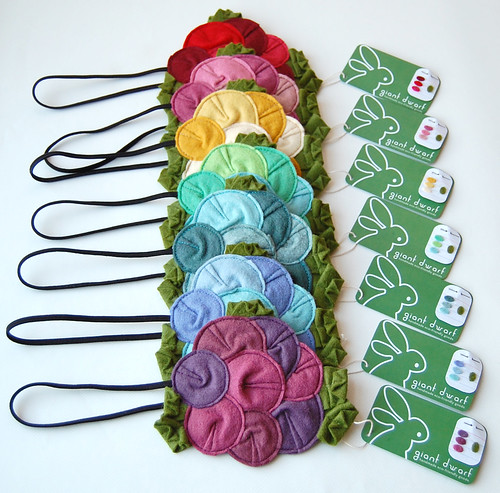
I was frightened and flattered at the same time, but after careful consideration and deliberation, I decided to take the offer. The initial order was for 50 fascinators, in two color ways, totaling 100 pieces to test on their website. If they would prove to be a success, they would order more to place in their top-selling stores around the country. I was overwhelmed, but confident I could make 100 of them. The very next day, they ordered 500, but I decided to stick with making only 100 pieces.

Giant Dwarf // Anthropologie

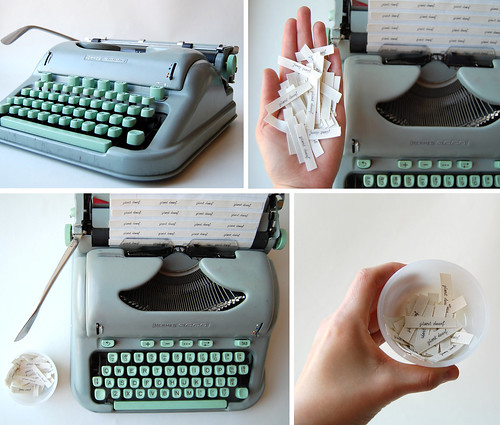
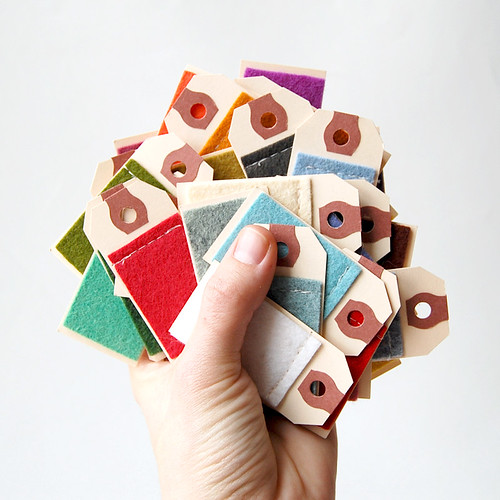
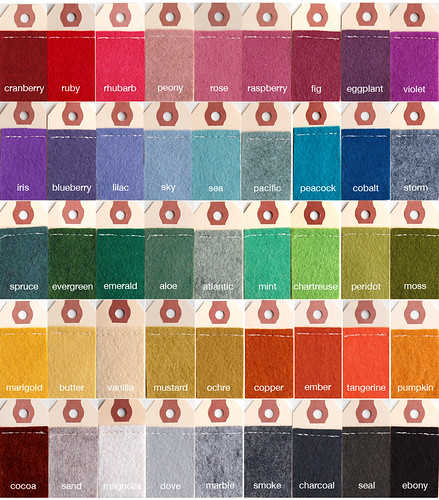
The order of 100 took a little over a month to complete, and as it is not always easy to make the same thing over and over, it was totally worth it. I have to give major credit to Nate for cutting all of the petals, all 800 of them, and snipping all of the threads, which I'm sure is into the thousands. He is amazing and I couldn't have done it without him! I also have to thank Nate's mom, Nancy, for sourcing + supplying the elastic headbands that I use to make the fascinators. Halfway through production I ran out of them and couldn't find them anywhere in Philly. For some reason, in the tiniest of towns in Vermont, she scored the motherload!

Giant Dwarf // Anthropologie

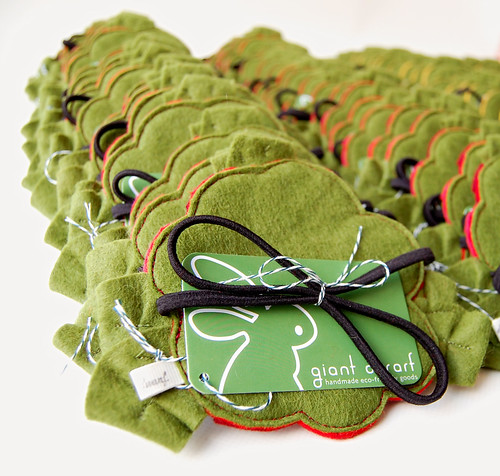
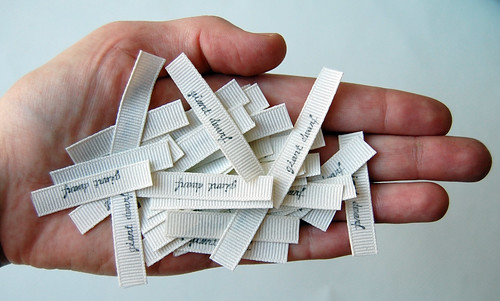
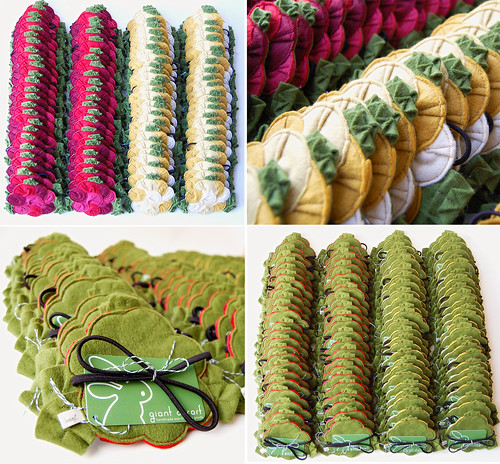
After the tracing, cutting, sewing, and snipping was all taken care of, the final step was packaging. Each fascinator had to be individually wrapped in protective plastic then shipped to Anthropologie's catalog warehouse for distribution. I decided to go a step further in the packaging process, because really, this was a chance of a lifetime and I wanted to make each and every one that much sweeter. I decided to use the ever-popular baker's twine, but in green + white, to string my hang tags and tie the elastic headbands with. I think it made such a difference and it was really fun to knot all of those adorable bows. I'm a huge fan of packaging + presentation and I'm so glad I added a little extra magic to each piece!

•••

This adventure has been a valuable learning experience and really is a dream come true for me + my tiny company to be included in such a lovely catalog of beautiful things!

March 18th // 2009

Hermes 3000 // Cursive Typewriter

My love for vintage typewriters began on a cross country move from Louisiana to Oregon with my best friend Nicole in 1999. I found my very first writing machine at an antique store + gas station in the middle of nowhere. Kansas maybe? Since that day, I have collected over 15 of them!
I always look for them at thrift stores, disguised by their little plaid-covered + leather-bound boxy cases, usually neglected amongst all of the ink-jet printers, radios, and tools. Some are plain, some are broken, and some are rare. My Hermes 3000 is like no other and I cherish it everyday!
I found this minty green beauty at a thrift store in Portland. I always check to make sure all the keys strike and the action is good. For some reason, there was a stack of loose leaf paper hanging out, so I decided to load the machine with a piece and type away. I wasn't really paying attention in my frenzy to get all of the letters, numbers, and symbols onto the paper, but as Nate hung over my shoulder, he pointed out that everything I had just typed was in cursive. I immediately went into shock, and then when I realized what I was about to take home with me, I felt extremely lucky and thankful. I shouted softly, Nate! It's cursive! One of my dreams came true that day!

Giant Dwarf // Hermes 3000

Most of our typewriters are on display, simply as decoration, but the Hermes 3000 gets a workout. When I started making Giant Dwarf crafts, and setting them free into the world, I decided each piece needed some sort of label or tag for identification purposes. I'm not much on labels or branding, but in the handmade world, I believe it to be of the utmost importance.
I thought about buying woven or printed labels, and then a wonderous idea surfaced! What if I could use the pretty typed font from my typewriter to create all of my labels with? It was worth a shot, at least! I took creamy white grosgrain ribbon and stuck it inside my typewriter to see if it would take the ink. It worked! I had found an alternative to label making. Yes, that's right, all of the Giant Dwarf labels are typed by hand, and true to the nature of my company, are all one-of-a-kind.

Giant Dwarf // Labels

Here's a mini tutorial on how to create your own typed ribbon labels. The process is simple and will work on any manual typewriter. Here's what you'll need:

• manual typewriter
• 3/8" grosgrain ribbon
• wide ruled loose leaf paper
• spray adhesive
• iron
• scrap of fabric

1. Measure + cut your ribbon to the length desired to fit onto your loose leaf paper.
2. Lightly spray the loose leaf paper with spray adhesive. I use Elmer's Mulit-Purpose Spray Adhesive, but any other brand will do.
3. Let the glue become tacky and place your ribbon onto the paper, using the lines as a guide. This will help to keep things nice + neat when you are typing.
4. Feed the paper into your typewriter and type away.
5. Once you are all done typing, gently remove each strip of ribbon. It should peel away with ease, but sometimes, if the glue is too thick, the ribbon might come away with a paper souvenir.
6. Now that your text is typed onto the ribbon, you'll need to heat-set the ink. Set your iron to the polyester or synthetic setting.
7. Sandwich the ribbon in between the piece of scrap fabric or press cloth, protecting your iron + ironing board from a sticky situation, and iron for 30 seconds or so. Be careful as those strips will be hot!
8. Take your lovely labels and do with them whatever you wish!

Please note! Due to the spray adhesive, some damage may be done to your typewriter. If you are fond of your machine, I would suggest using a junker from a thrift store to play with first!

•••

Making labels by hand does take quite a bit of time, but attention to detail means so much to me. I know there are quicker ways of manufacturing such a thing, but I feel like I'm living up to the true meaning of handmade!

March 8th // 2009

Wool Felt // Swatch Cards

I'm so excited to mention the arrival of Wool Felt to my Etsy shop! This is the same Wool Felt that I use to embellish my Cloche Hats + create my Rosette Fascinator Headbands with.

Wool Felt is one of the most wonderful fabrics to craft with. The colors are vibrant and the quality is unbelievable. It is soft, yet durable, and can be used to make just about anything from heirloom dolls to hair pieces to penny rugs. Wool Felt is not at all like craft felt, which is usually acrylic or polyester, therefore it will not pill, shed, or stretch out of shape. You can also wash + dry Wool Felt if you want a bubbly + soft boiled wool look, and if you change your mind, you can just iron it out.

Wool Felt is a composition of wool and rayon, which breaks down to 20% Wool/80% Rayon or 35% Wool/65% Rayon, and is made in an eco-friendly facility in the United States. The squares, rectangles really, are 9 X 12 inches and are available in an assortment of 45 delicious colors, at $10 per dozen.

I sewed little swatches of the entire Wool Felt collection to tiny manilla tags to create a nice + neat chart. Aren't the colors yummy?

Wool Felt // Swatch Cards

Cranberry.Ruby.Rhubarb.Peony.Rose.Raspberry.Fig.Eggplant.Violet

Iris.Blueberry.Lilac.Sky.Sea.Pacific.Peacock.Cobalt.Storm

Spruce.Evergreen.Emerald.Aloe.Atlantic.Mint.Chartreuse.Peridot.Moss

Marigold.Butter.Vanilla.Mustard.Ochre.Copper.Ember.Tangerine.Pumpkin

Cocoa.Sand.Magnolia.Dove.Marble.Smoke.Charcoal.Seal.Ebony

•••

Hop on over to my Etsy shop for your very own stack of Wool Felt to create something truly wonderful with!